Tuesday 30 June 2015

Weekly Challenge Winner - Bows


Hi everyone,

It's Tuesday and time to announce our latest 
winner for our last Challenge! 

Last week I gave you Bow or Bows,
twelve of you took up the Challenge, thank you!

You do seem to enjoy taking part which is brilliant for us.
It is great to see your projects, we have some very 
talented followers!

So, here we go......

Mr Random Generator has picked........


........no 1........

Jane's Journal


Congratulations Jane, please email me at
janecraftbarn@gmail.com
so that I can send you your prize voucher!


Ok, have a good week everyone, it's going to be
a hot one here!!  
Keep safe in the sun!

See you soon,


Jane x

Sunday 28 June 2015

Weekly Challenge


Morning all,

Welcome to the last Weekend Challenge for June!

Next week it will be July and don't forget that means 
Saturday will be Inspiration Day at the shop.
We will have demonstrations in the shop
featuring the wonderful Tando Creative products!

Do come and visit if you are able to.....
Di Oliver, Mrs Tando herself, will be with us,
Helen Chilton and myself!

So, what about our new challenge, what will it be
 this time??

Well I think we should stick with stars and stripes but
I reckon you should pick stars OR stripes!  You can't 
have both! Haha!!

So that is your challenge for the week, stars or stripes 
on anything you like!  You choose!

Entries, as many as you like, via the link below, if possible or
 email me at 
janecraftbarn@gmail.com

You have one week, entries will close at midnight
Sunday 5th July. 

Mr Random Generator will pick the winner who 
will be announced on Tuesday 7th July.

Good luck to you all,


Jane x


Adding these pics as something happened to the link!
I'd like to blame it on the link but it was probably me!!
Sorry to those who found it closed......


10, 11,12 Butterfliecrafter


13 Maggie


14 Kristiina


15 Linda 49


Saturday 27 June 2015

Stars and Stripes - Neil Walker


Hi everyone,

Welcome to the weekend, rain is forecast but 
apparently it is going to be very hot here next week!
Whoop whoop summer is coming!!

So back to Stars and Stripes,
today we have Neil.  


Neil describes this as a simple tag, I don't think I 
would call it that.....it's beautiful!!


Colour a no. 10 tag with Distress Ink.


Lay mask on top and spritz with water. Remove mask and dry tag
 to bring out the lighter areas.


Stamp the tag top and bottom with the cogs background stamp in
 both colours Distress ink.


Add some darker areas to the rays with Walnut Stain.


Stamp your sentiment in black Archival. Add a couple of chipboard
 stars that have been given a few layers of UTEE, stamped
 into and coloured with Treasure Brass.


Stamp the cogs background onto the top and bottom of the
 tag using Versamark; add UTEE and heat. Add colour using
 Treasure Brass.


To finish the tag add some ribbon to the top.


I love that sentiment.......thanks Neil.

A lovely tag, if you want to have a go then
this is what you'll need -


I hope you are enjoying your weekend, I'll be back tomorrow
with our new weekly challenge so if you haven't entered yet, 
you better hurry!!

Also it will be July soon so don't forget to get you June 
Calendar page entered too!

See you tomorrow,

Jane x


Friday 26 June 2015

Stars and Stripes - Dawn Heald


Morning all,

Hope the weather is being a bit kinder to you wherever you are!
We have had some nice days at last so I hope it is going to stay 
for a while!

Ok, this week, a little early, but we are featuring 
Stars and Stripes
in honour of our friends across the pond!
Independence Day on the Fourth of July.
It is a federal holiday in the USA commemorating the adoption 
of the Declaration of Independence on July 4th 1776, 
declaring independence from Great Britain!
So now you know!

We are kicking off with Dawn and her project.

Dawn says ....

This week for Stars and Stripes I've gone the Americana
 route using the Stamping Bella The Way You Move stamp to
 depict dancing and celebrating 4th July. As a base I've used 
one of the Tando Mixed Media boards which are a perfect start
 to any project.


Method -
Start by spreading a very thick layer of white Gesso across
 the Tando Board, creating textured diagonal lines don't smooth
 too much and leave to air dry.


Lay down some thin strips of washi tape horizontally. Paint
 the uncovered stripes with Primary Red paint. Remove tape,
 dry then place some more tape on the red stripes and paint the 
uncovered stripes with the Decoart Media White Crackle Paint.
 Leave to dry. Then paint on a thin layer of Decoart Media Satin
 Varnish and let dry. When dry outline the stripes with black pencil
 and smudge lightly.

Whistle waiting for drying, paint a piece of card with blue
 acrylic paint, dry, apply a thin layer of PaperArtsy Crackle
 Glaze and re paint with Space cadet blue paint.
When cracked and dry, spread some Pebeo modelling paste
 through stars stencil. As it dries this will also crack. Great 
unexpected texture here. Use a white gel pen to add some doodling.

 Use frosted lace Stickles over the stars. Cut to size and glue 
to your stripey board.


Now add some stamped words. Using the Tim Holtz stamps, take
 one of the sentiments, mask off the parts you don't want, ink up
 with black Stazon, remove masking tape and stamp onto
 the board.
Finish the edges by swiping Black Stazon around it and then a
 small amount of gold gilding wax.


Stamp The Way You Move with black Memento and colour with Pro
 Markers. Cut out just the girl image.


Take three Tando Stars from the grab bag and paint the edges white.
 Then heat emboss four layers of gold embossing powder. On the
 final layer, whilst still hot, press the background number stamp
 into the star, pull off when cool after a few seconds. More
 great texture.


Arrange and glue down the stars onto the board, then with glue 
gel adhere the girl in place.


How nice is that??
I love that little Stamping Bella Stamp, might have to take
a look at those......

If you want to have a go, this is what you'll need -

From own stash
Thin washi/paper tape, black pencil

Hope you have enjoyed the project today, let us
know what you think.  We love to read your comments!

See you tomorrow,

Jane x 

Tuesday 23 June 2015

Weekly Challenge Winner - Butterflies


Hellooo,

Well the summer has been and gone, I must have blinked 
and missed it.  Back to rain and chilly wind.

Are we going to get some nice weather this year??

Ok, time to announce our winner for the 
Butterflies Weekly Challenge.
Wow, your entries were stunning, thank you to all 
of you who entered....Mr Random Generator nearly
blew a gasket trying to pick the winner!!

Anyway....out of 19 fab entries, he picked......


no. 10

Elly's Creaties


Congratulations Elly's Creaties, please email me at
janecraftbarn@gmail.com
so that i can send you your prize voucher!

Ok folks, enjoy your week and I'll see you soon,

Jane x

Sunday 21 June 2015

Weekly Challenge


Hellooo,


Hope you are all having a good weekend.

It is Sunday again and time for another Weekly Challenge.

Goodness I'm finding it hard to come up with new ideas, 
can't give you Punch Boards which we have featured last week
as I'm sure we are not all lucky enough to own one.

We have done Bunting, we've done Bags so I think
I'm going to give you Bow or Bows 
as featured in Neil's post!

Ha...what do you think of that???

You can make a bow or bows, use a bow as a
decoration on a card, scrapbook page, gift
whatever you like.  It can be paper, ribbon anything 
you fancy!

Well that gives you something to think about!!

OK, same rules as usual, as many entries as you like,
via the link below or if you are unable to do that, email 
me your picture at janecraftbarn@gmail.com

The link will close at midnight on Sunday 28th June
and the winner will be picked by Mr Random Generator
on Tuesday 30th June.  The winner will receive a 
£10 gift voucher.

Good Luck,

Jane xx


Saturday 20 June 2015

Punch Board - Neil Walker


Morning all,

It's the weekend....yay!!

What have you all got planned...hope it's good!

Don't forget it is the longest day tomorrow, just as we are 
getting some nicer weather and longer evenings, we are 
halfway through the year and the evenings will get shorter....
....the days colder....and Christmas will be here again.
Yeuch...horrible thought, I love Christmas but they definitely
get closer together as you get older.

Ok, here is our last project for the week using the 
wonderful Punch Boards, perhaps you will treat yourself
to one....or two!!

It's Neil's turn today.

Neil says -

I do like these Punch Boards as they make it easy to create
 multiple projects making them ideal for party favors and
 batch makes. My favourite has to be the envelope maker. 
As it says; it is designed for envelopes, but today I thought
 I'd share a couple of the other things you can use it for.
(I have a post showing how to make envelopes here if you want


So today, how about bows?


And tabs?


Let's start with the bows:
I've made 2 sizes and to save me having to write it over and
 over again, all measurements are in inches.

So, beginning with the larger bow you need a strip of paper
 10 x 1 1/2 
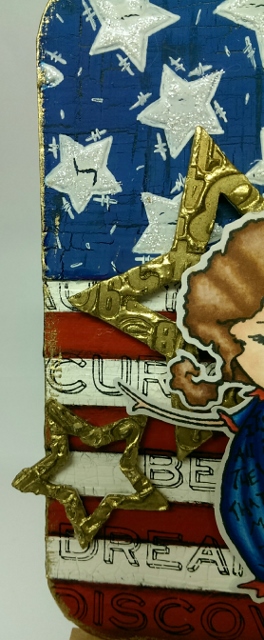
(I've used plain card decorated with Distress ink and Viva
 stamps though you can use patterned paper too which is ideal
 if you want to match up your project)


Place the edge of the strip into the punch board and punch. 
Repeat for the other side too.


Line up the strip to the 2 line and punch.


Move along to the 5 and punch.


Flip the card over and repeat the 2 punches to do the
 opposite sides.


Starting from the other side, line up to 2 and punch, flip 
over and punch again at 2.


You then end up with something looking like this.


Use a pen or similar to curve the two inner sections of the card.

`

Fold the other edges up as seen.


Add glue to the back and fold and glue in place as seen.
Repeat for the other side.


Glue the bow to the back with some tape to hold it down
 if desired. 


Add a small flower to the middle to finish off.

To make a smaller bow the process is the same but using a
 1 x 7 1/8 inch strip and punching at 1 1/2, 3 1/2, 1 1/2
 (and don't forget the ends too)


 Here's a couple. I've varied the placement of the ends to
 give a different look.

Then, how about some tabs?

For this I have used 5 x 5 inch card. Once you have got
 the principle you can adjust measurements to create 
different sizes to suit.


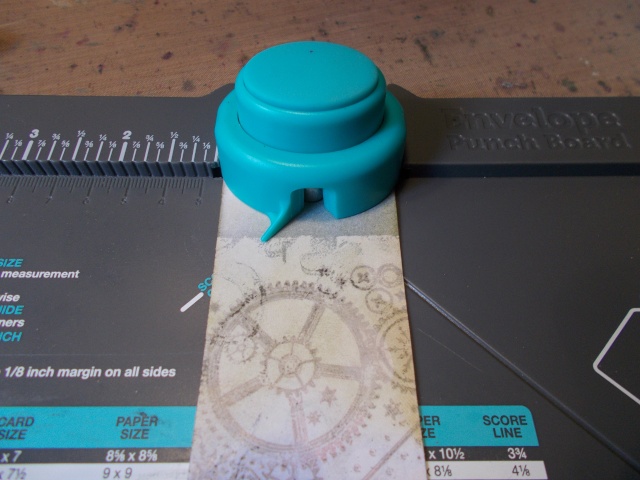
So, beginning with a piece of card, place it so the edge
 is on the halfway mark of the punch and punch.


Slide across to the 1 mark and punch.


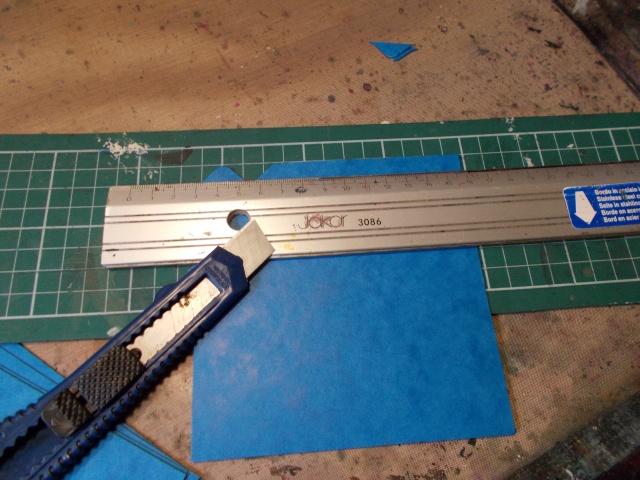
Trim off the section to the right of the tab with a craft knife and 
your first tab is done.


Take a second card and line up the edge with the 1 mark 
and punch, Slide across to the 2 mark and punch.


Trim the edges to the left and right to leave your second tab.

Then repeat with your other cards working in the following order

Card 3 : line up at 2, punch, move to 3 and punch. Trim
Card 4 : line up at 3, punch, move to 4 and punch. Trim
Card 5 : line up at 4, punch, move to 5 and punch. Trim

I did this twice which gave me 10 pieces. I cut two pieces of
 chipboard to size and punched holes. Adding book rings gave 
me a mini book ready to be decorated with tabbed dividers......


Thank you Neil, oh I just love that book, might have to 
invest in these boards myself!

If you want to have a go, this is what Neil used...


Well that's it for another week!
I'll see you tomorrow with our new Weekly Challenge.
Enjoy your weekend.

Jane x